The delivery price is calculated during checkout based on your location and the goods ordered. Our basic delivery prices are:
Delivery within Canada: $53.00
Delivery Service: Five working days*
* For products that are in stock and the order received by midday.
Some products go through a final configuration and calibration before being shipped. If the calibration labs are busy this can add up to two days on to the delivery schedule but guarantees a fresh calibration.
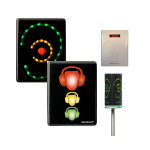
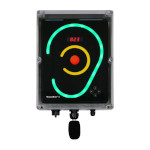
The SoundEar II mounts on the wall and can be set to light up when the noise levels are too high. Unlike many noise monitoring products the SoundEar has been specifically designed to look good. This is clearly important when the unit is to be mounted in a public place.

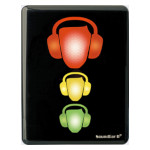
The "you are being too loud" message that the SoundEar provides is unmistakable to both children and adults, allowing them to take immediate action without the embarrassment of somebody having to ask them to be quiet.
Often the biggest issue is with loud voices. A reminder from a sign is better than from another person as it takes away the human perception of noise (maybe the complainer is being a little over sensitive sometimes). It removes the embarrassment from the complainer and from the noisy person.
Different areas need more quiet than others. A hospital recovery room needs to be very quiet, whereas a waiting room is not so critical, as long as visitors are not talking too loud or shouting. A school classroom should be reasonably quiet, but the cafeteria a little louder.
The sound level at which the lights come on is set using a dial that is hidden on the back of the sign.
The SoundEar Noise Warning Sign can help where people need to be reminded to keep their noise levels down. For example, in hospitals the noise comes from patients, staff and of course from visitors. The presence of the sign is usually enough to remind people that noise is an issue. The yellow and red lights are for those who forget or who are unable to judge what "too loud" is.
The types of noise that will usually trigger the SoundEar are:
Controlling sound levels in hospital corridors, rooms and nurses stations. Just the presence of the sign is often reminder enough to a successful noise control program.
The SoundEar Noise Warning Sign has proved very popular in hospitals, reminding staff, patients and visitors to be quiet in the usual locations:
These signs are commonly used within NICU and neonatal units, as well as on other general and intensive care units to remind not just the visitors but also the staff and patients to keep their noise levels down.
The presence of the noise warning sign in an obvious location is often enough to remind people about the area's sensitivity to noise.
Other than important alarms, there is usually no need for excessive noise on a hospital unit. It is usually caused by visitors and sometimes staff talking louder than necessary or people being careless when moving medical equipment or patients between rooms.
The SoundEar II is a clear and simple reminder to keep the noise levels down and if you forget it lights up to remind you.
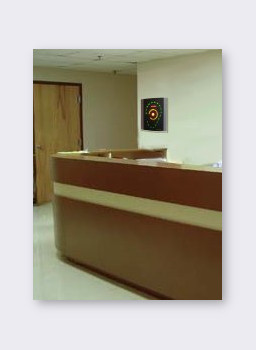
The perfect location for a sign depends on the layout and the acoustics of the area in question. The most important aspect of the SoundEar is that it reminds people to keep the level down, so it is best to mount them where clearly visible to anybody entering the room or area. Often the Nurses Station is a good place to position one unit as this is usually in view to any body visiting and also to constantly remind the staff.
There is no simple rule about the level at which the sign should light up. Hospital units and areas have different ambient noise levels and different acceptable limits. An intensive care unit will have a much lower noise threshold than a busy area dealing with less critical illnesses. The best way to find the comfortable limit for an area it to set the sign up to 55 dB (using the dial on the back). Run the sign for a few hours, or even a few days, and get a feel for whether it is being too sensitive for the given environment or whether it is letting people get away with too much. Adjust up or down by 5 dB as needed.
A level of 45 to 55 dB is common for neonatal and intensive care units and 50 to 60 dB is common for other areas, although it does depend a lot on the acoustics of the areas in question.
Hospitals with concern about the noise levels in neonatal, intensive care and children's units are our biggest customers for the noise warning sign. Babies in intensive care are particularly sensitive to high noise levels and to the increased stress that they cause.
Noise from visitors and staff is best dealt with using a device such as the SoundEar as it is not influenced by the complicated human perception of noise.
Neonatal units, like most hospital environments, tend to be very poor acoustically due to hard, reflective surfaces. Beds are often closely spaced, visitors can talk loudly (especially the younger ones) and staff have to work quickly and move equipment about. Add to this the incubators being opened and closed, occasional tapping on the lid and items dropped accidentally and the noise levels soon become unpleasant for the baby. One of the biggest culprits is the alarm, which is clearly essential, but as the background noise levels get higher the alarm has to be louder still. A quieter background allows for quieter alarms.
The immediate effects of noise in the neonatal unit are reasonably clear. The baby's sleep is easily disturbed and sudden loud noises (bangs on the incubator for example) can have a startling affect on the heart rate and breathing patterns.
High and intermittent noise is also unpleasant and distracting for both staff and parents. Defined "Quiet Times", when noise and light levels are kept down, certainly help and are now used in many units.
The long term effects of noise in the NICU are not so obvious. Hearing impairment as a result of exposure to high noise levels can be expected but research over the last few years has also shown a link with language development. This seems to be related to the fact that a baby that goes full term is only exposed to lower frequency noise (< 250 Hz) during the brain and sensory development stages.
High noise levels in offices and call centres is usually the result of staff talking too loudly.
Unlike noise in factories, which is covered by regulations for the protection of hearing, noise in offices does not usually cause such damage. The main problems here are with general irritation and making other communication difficult. Some of these problems can be dealt with to some extent by ensuring the room acoustics are good, or even using a noise masking system, such as white noise generators.
Reducing the noise at source us usually the best approach. A manager can ask people to quiet down, but this can cause embarrassment and bad feeling, and also depends on the manager's perception.
These office noise problems are best dealt with using a SoundEar Noise Warning Sign. Mounted on the wall at key positions, the SoundEar's mere presence will remind people to keep their voices down to a reasonable level. Should they forget, it lights up as a reminder, giving a very clear message.
Good communications is clearly extremely important in a classroom, so high noise levels are not desirable. After (trying to) keep quiet in a classroom for much of the morning, the cafeteria can seem like a good place to release some energy, although not all present will agree. And finally, a gentle reminder to keep voices low in a library can take away the need to verbally remind people where they are.
Mounting a SoundEar Noise Sign in a prominent position in the class room, cafeteria and library will give a clear reminder. The noise level at which the sign lights up can be set accordingly: low sound level for the library, slightly higher for the classroom and a little more forgiving in the cafeteria.
The SoundEar II mounts on the wall on a single screw - see our Installation page for more details. It comes complete with a power adapter, which provides the safe low voltage that the noise sign requires.

Music from pubs, clubs, discos and even restaurants and hotels can cause problems for local residents and be at dangerous levels for staff. The SoundEar II Noise Sign is the perfect solution to keeping control of the noise and monitoring the effectiveness of controls.
The SoundEar II Noise Warning Sign can be set to light first the yellow and then the red lights when the noise level is above the set limit.
One of the major problems of controlling noise levels in clubs is that of human perception. If the music is to somebody's taste it will not sound so annoying as to whom it is not. On top of this, after just a short time being exposed to high levels the ear becomes less sensitive so it is very difficult to decide whether the level is too high without the use of a noise level measuring device such as the SoundEar.
The SoundEar is mounted on the wall using a single screw and plugs into the power using the adapter provided. It is very quick and easy to install.
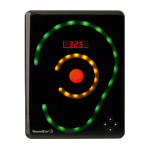
The data logging version of the SoundEar (the SoundEar 3) stores the sound levels, giving evidence of compliance (or non-compliance). If you need to see how the sound levels have been in your absence then this is the ideal option.
The measurements can be downloaded to a computer using the software that is included with the SoundEar 3.
The SoundEar II Noise Activated Warning Sign is very easy to install. A simple three to four point process:
The mounting point can be seen on the rear of the noise sign. A single screw in the wall is adequate to hold the light-weight sign.


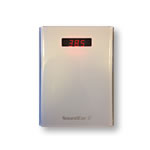
The SoundEar II comes complete with a power adapter. This provides the safe low voltage that the noise sign requires.
An optional power adapter is available for use in areas that need high electrical safety, such as hospitals, and has been approved in accordance with IEC 60601-1 (medical electrical equipment).
The perfect location for a sign depends on the layout and the acoustics of the area in question. The most important aspect of the SoundEar is that it reminds people to keep the level down, so it is best to mount them where clearly visible to anybody entering the room or area.
There is also no simple rule about the level at which the sign should light up. Different areas have different ambient noise levels and different acceptable limits. When a reasonable background level is required for conversation then a good starting point is to set the noise sign to light up at 55 dB(A) - the yellow lights will come on at 50 dB(A). Run the sign for a few hours, or even a few days, and get a feel for whether it is being too sensitive for the given environment or whether it is letting people get away with too much. Adjust up or down by 5 dB as needed.
The SoundEar II also has standard 75mm x 75mm VESA mounts - this is the standard for mounting televisions and monitors, so many types of mount are available.
A VESA mount is not included with the SoundEar II.
We offer two VESA mounts for use with the SoundEar II. The wall mount bracket (order code SE2VESA) can be fixed to a flat surface such as a wall. It allows some adjustment side to side and up and down to improve the viewing angle. The pole mount (order code SE2VESAP) mounts on a 30 mm to 50 mm pole (pole not included).

The standard noise activated warning sign, order code SE2EAR, comes with everything you need to get started:
Options include a VESA wall mount, for mounting the sign at an angle or in a corner, and an external microphone on an extension cable that plugs in to the bottom of the SoundEar II sign.
| Order Code | |
| SE2EAR | SoundEar II Noise Sign |
| Wall mounted noise activated warning sign including power adapter and user manual |
| SE2VESA | VESA Wall Mount |
| For angled or corner mounting | |
| SE2VESAP | VESA Pole Mount |
| Mounting on a 30 to 50 mm pole (not included) | |
| SEEXT | External Microphone |
| With 2m extension cable | |
| SEEXTCAB5 | Additional 5m Mic Extension Cable |
| Requires SEEXT option, mic not included | |
| POWEX10 | Power extension cable 10m |
| Working at a distance from power outlet |
These packages consist of a noise warning signs and a basic noise meter. The noise meter (an NM102 Sound Level Meter) can be used when setting up the SoundEar signs and for spot checks.
| SE2EAR5 | Five Noise Warning Signs with a Noise Meter |
| Package includes five SoundEar Noise Warning Signs along with a hand-held Noise Meter. The overall price is less than buying five individual noise warning signs. | |
| SE2EAR10 | Ten SoundEar Noise Warning Signs with a Noise Meter |
| Package includes ten SoundEar Noise Warning Signs along with a hand-held Noise Meter. The overall price is less than buying ten individual noise warning signs. |
| Dimensions | 265 x 205 x 46 mm, 10.4" x 8" x 1.8" |
| 1.5 kg, 3.3 lb | |
| Electrical | 24VDC - adapter included |
| Frequency Range | 20Hz to 16kHz |
| Trigger Range | 40 to 115 dB in 5dB steps |
| Freq. Weighting | A |
| Time Weighting | Slow |
| Deviation | ±3dB |
| Temperature | Operation: 0 to 50°C |
| Storage: -20 to 60°C | |
| Damp & Dust | IP42 |
| Cabinet | Cabinet: Shockproof acrylic |